Introduction to Financial Ident Verification
Overview
The bank of your end-user has already performed a comprehensive identification process to verify account ownership during the account opening. MIS Connect’s Financial Ident Verification leverages this verified information to enhance your application’s onboarding process. By connecting and sharing account information, your end-users can quickly access your core service offerings without the need for time-consuming identification methods like micro-deposits or manually uploading bank statements. MIS Connect has developed an advanced name-matching algorithm that compares the name provided by your end-user with the account holder name retrieved from the user’s bank account information.
Optionally, you can also combine Financial Ident Verification with fetching your users' account transactions.
How it Works
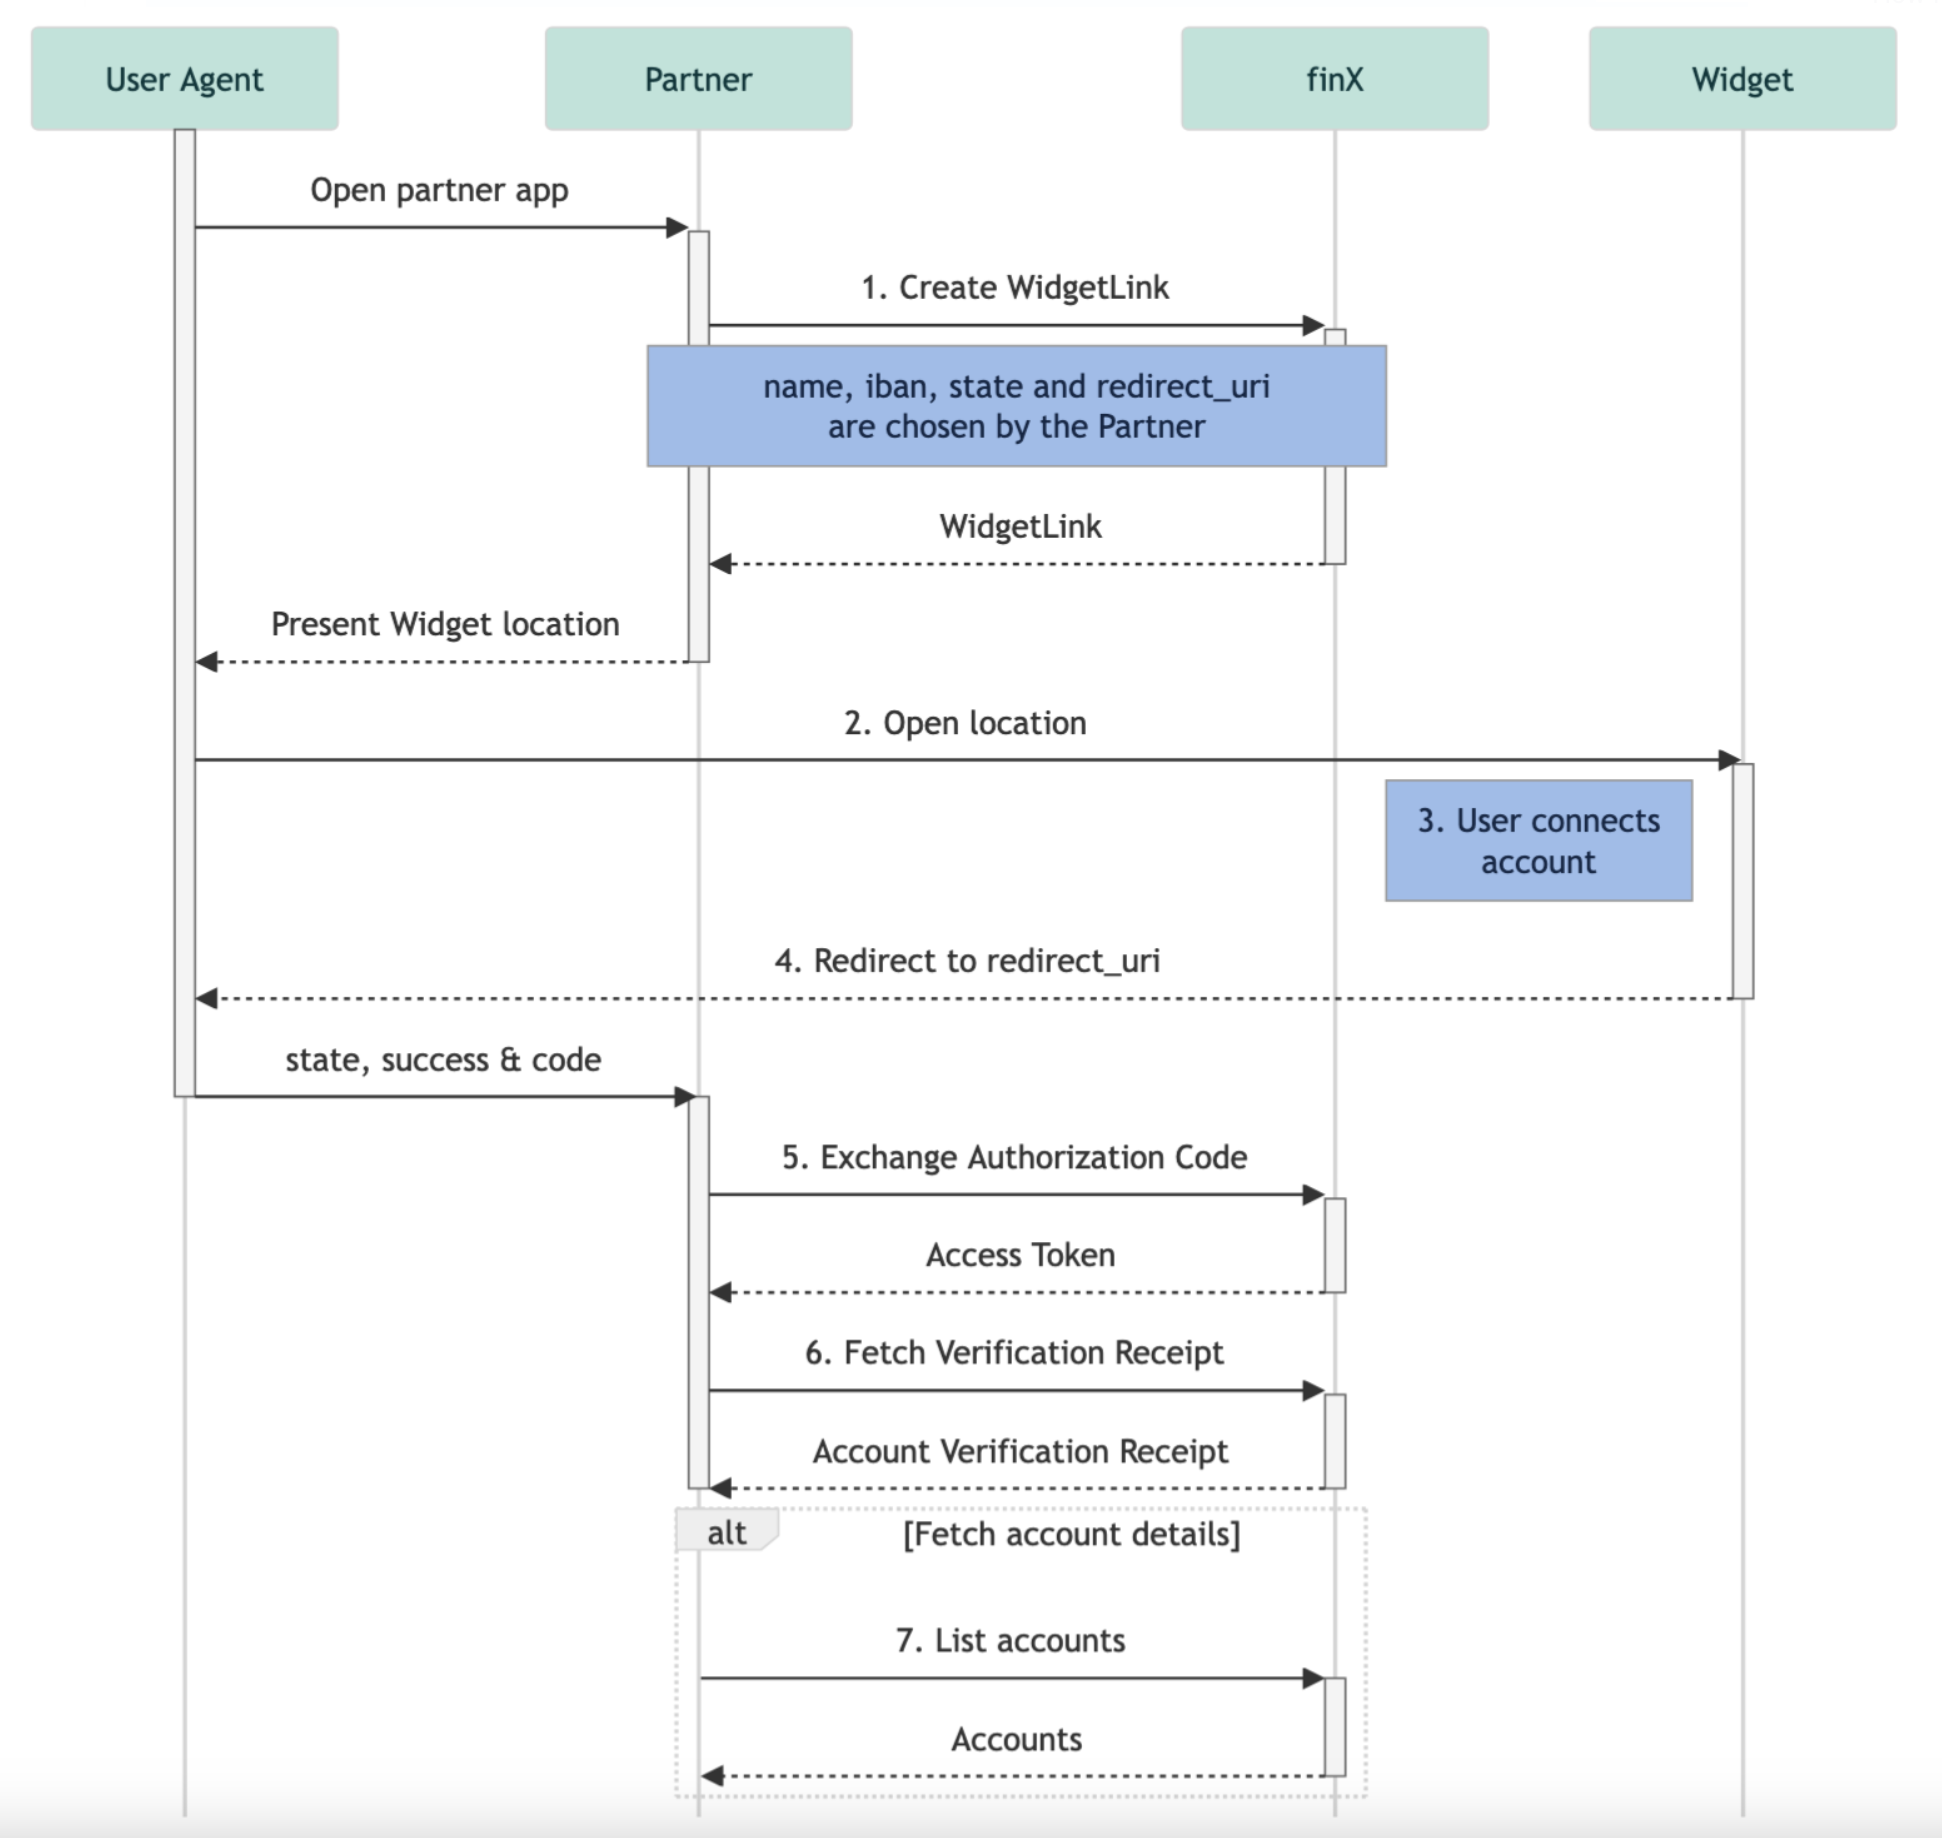
- User Agent Opens Partner App: The process starts when the user agent (such as a browser or mobile app) accesses the partner’s application.
- Partner Creates WidgetLink: The partner generates a
WidgetLinkcontaining parameters likename,IBAN,state, andredirect_uri, which are selected by the partner. These parameters help maintain session state and define where the user will be redirected after completing the widget process. - Partner Opens Widget Location: The partner app directs the user to the location specified by the
WidgetLink, typically an embedded widget within the app or a separate web page. - User Connects Account via Widget: The user interacts with the widget provided by MIS Connect to connect their bank account. This step involves the user confirming their account details.
- Redirect to
redirect_uri: After successfully connecting the account, the user is redirected back to the partner’sredirect_uri. The redirect includes thestate, asuccessindicator, and anauthorization code. - Exchange Authorization Code: The partner exchanges the received authorization code for an
Access Tokenfrom MIS Connect. - Fetch Verification Receipt: The partner uses the access token to request an Account Verification Receipt, confirming that the account details provided by the user have been successfully verified.
- ptional] FFetch Account Details: If needed, the partner can use the access token to fetch additional account details for the user.
- List Accounts: Finally, the partner retrieves and lists the accounts associated with the user, based on the verified information.
Prerequisites
API Access & Authentication
The MIS Connect API is a RESTful API that is accessed using HTTP Basic Authentication, where a Client ID is used as the username and a Client Secret as the password. Each customer receives a unique Client ID and Client Secret from MIS Connect during the onboarding process to access the API, with specific Scopes attached to it. Scopes define the usage rights of each Client ID on the MIS Connect platform.
If you want to get started with your dedicated credentials, please reach out to us!
Widget Integration
Before continuing with the implementation guide, please view our Widget Integration best practices.